Key Takeaways
- Match the bag style to the type of vacuum sealer you own.
- Use pre-cut bags for speed and rolls for custom-sized portions.
- Clean, dry bag openings and sensible portion sizes help create dependable seals.
- Vacuum sealing can limit freezer burn, but safe temperatures and handling still matter.
- Labels, flat freezing, and first-in, first-out rotation make a freezer easier to manage.
A well-organized freezer begins with packaging that fits the food and your routine. Vacuum sealing removes much of the air around food, helping protect texture and flavor during frozen storage while making packages flatter and easier to stack.
When comparing formats, vacuum sealer bags from Vacuum Sealers Unlimited provide a useful point of reference because the company specializes in food vacuum-sealing equipment, textured bags and rolls for countertop machines, chamber pouches, and meat-processing supplies for home and commercial users across the United States. The right package is not necessarily the thickest or largest one. It is the one compatible with the machine, suited to the food, and easy to store.
Why Freezer Organization Starts With Better Packaging
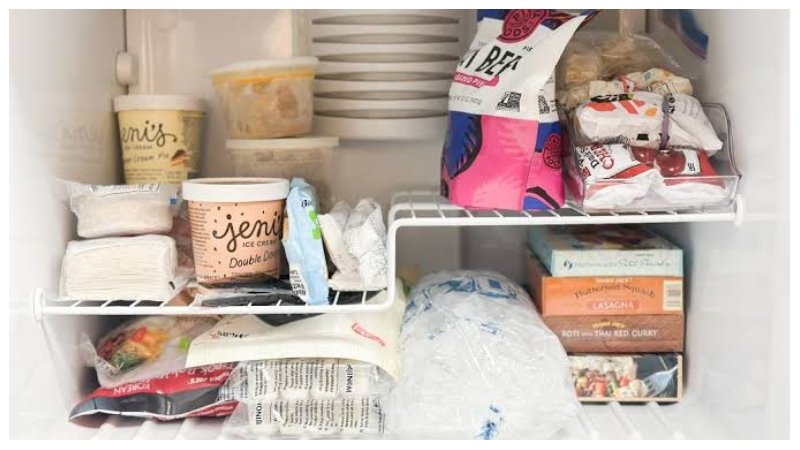
Loose wrapping and oversized containers can leave unused air space and create bulky shapes that waste room. By contrast, flat packages can be stacked in layers or filed upright like records. Keep food frozen at 0°F or below. As USDA freezer storage guidance explains, food held continuously at that temperature remains safe, although longer storage can reduce quality.
Match the Bag to the Sealer
External Suction Sealers
Most external suction sealers for countertops use textured or embossed bags. The texture creates channels that help air move from the bag toward the vacuum port. Before buying wide bags or rolls, measure the machine’s sealing bar and confirm the manufacturer’s compatibility guidance.
Chamber Vacuum Sealers
Chamber machines remove air from the entire chamber rather than drawing it through the open end of a bag. They commonly use smooth, flat pouches and can be especially practical for soups, marinades, and other liquid-heavy foods. Flat chamber pouches and textured external-sealer bags are different products and should not be treated as interchangeable.
Handheld Systems and Specialty Bags
Handheld systems often use zipper bags with one-way valves. Reusable bags can be useful for foods opened frequently or for short-term storage, provided they are cleaned and dried thoroughly. Check whether a specialty bag requires a particular valve, port, or accessory before purchasing it.
Pre-Cut Bags or Rolls?
- Pre-cut bags: Best for everyday meal portions. They are fast to fill and seal, but may leave excess material around unusually shaped foods.
- Rolls: Best for bulk meat, garden produce, or long cuts. You can make a custom length, though you must cut the material and seal one end first.
- Reusable zipper bags: Best for foods used repeatedly. They can reduce the use of disposable bags but require more careful washing and drying.
Choose the Right Size for the Food
- Measure the food at its widest point.
- Leave enough empty material above the food for a clean, complete seal.
- Avoid putting a small portion in an excessively large bag.
- Allow extra space for sauces, marinades, sharp edges, and irregular shapes.
- Portion food according to how you expect to thaw and cook it.
Small bags work well for berries, chopped vegetables, cooked grains, and individual chicken breasts. Wider bags are useful for steaks, family-sized meal portions, and soups frozen flat. Right-sized packages occupy less space and make it easier to thaw only what you need.
Bag Materials, Thickness, and Temperature Ratings
Choose food-contact bags designed for the job you have in mind. BPA-free materials are a common baseline, but thickness alone does not determine performance. Foods with bones, shells, or rough surfaces may need more durable film or protective wrapping around pointed areas. Check the packaging for freezer, microwave, boiling, or sous vide ratings. Do not heat food in a bag unless that specific product is intended for the planned temperature and use.
How to Seal Food Without Weak Spots
- Start with fresh food that is cold before packaging.
- Keep the inside of the bag opening dry and free of grease or food particles.
- Do not overfill the bag.
- Smooth the opening flat across the sealing area.
- Use a gentle vacuum setting for delicate foods when your machine offers one.
- Inspect every seal before placing the package in the freezer.
Handling Liquids, Marinades, and Soft Foods
With an external suction sealer, liquid can travel toward the seal bar and interfere with sealing. Chill or partially freeze soups, sauces, and marinated foods before sealing, and leave additional room at the top of the bag. A chamber machine can be more convenient for frequent liquid packaging. For bread, berries, chips, or delicate baked goods, freeze the food briefly on a tray first or use a gentler cycle to reduce crushing.
Vacuum Sealing for Meal Prep
Divide cooked meals into single-serving or family portions, then label each package with the food name, preparation date, and serving size. Freeze packages flat before stacking them vertically or horizontally. Keep similar foods together and place older labeled packages where they will be used first. This first-in, first-out approach reduces forgotten food and makes weekly meal planning simpler.
Meat, Fish, Game, and Sous Vide
Bones and sharp edges can puncture film, so cover pointed areas before sealing. Use a gentler vacuum cycle for fish and delicate cuts when possible. A family buying a large package of meat can divide it into meal-sized portions before freezing, avoiding repeated thawing of the entire purchase. For sous vide cooking, use bags rated for the intended cooking temperature, consider double-sealing for long cooks, and follow the equipment and bag manufacturer’s instructions.
Food Safety Rules That Still Apply
Vacuum packaging does not make perishable food shelf-stable. Keep refrigerated vacuum-packed foods at 40°F or below, keep frozen foods at 0°F or below, and thaw food in the refrigerator, cold water, or a microwave instead of on the counter. Vacuum-sealed food safety guidance reinforces why low-oxygen packaging still requires proper temperature control.
Common Mistakes That Lead to Leaks
- Using a bag style that is incompatible with the sealer.
- Filling the bag too close to the sealing area.
- Leaving moisture, grease, or crumbs across the bag opening.
- Leaving sharp bones or shells exposed.
- Freezing a package without checking that the seal is complete.
- Skipping labels and losing track of dates or contents.
Build a System That Fits Real Life
The best freezer-storage system matches your food habits, sealer type, available space, and cooking schedule. Choose compatible bags, portion food intentionally, leave room for a clean seal, label every package, and maintain safe temperatures. Those simple habits can make bulk shopping, garden harvests, leftovers, and meal prep far more manageable. Click here for more Information.